
How to Check if Eggs are Fresh Before Cooking
Before preparing your perfect hard-boiled eggs, it's essential to verify their freshness. Knowing the condition of the eggs not only ensures a better final result but also guarantees food safety. Here are three proven and effective methods to check egg freshness.
The Salt Water Method
To determine if an egg is fresh, fill a glass with water and add some salt. When submerging the egg, three situations can occur:
- If it sinks and lies horizontally at the bottom, the egg is very fresh and maintains its original density perfectly.
- If it stands vertically, it means the natural aging process has begun but it's still safe to consume.
- If it floats on the water's surface, the egg has developed too much internal gas and should be discarded immediately.
The Sound Test
Gently shake the egg near your ear. A fresh egg shouldn't make any sound, as the white remains firm and cushions the yolk. If you hear internal movement, it means the egg isn't fresh.
- A fresh egg should remain completely silent because its internal components are firmly bound together.
- A soft sound when shaking indicates that the internal membrane has begun to deteriorate and allows movement.
- A strong liquid noise is a clear sign that the egg has lost its internal structure and shouldn't be consumed.
Visual Inspection
The external appearance of the egg can reveal much about its freshness. A quality egg should maintain certain visual characteristics that indicate its good condition. Additionally, the texture and appearance of the shell are key indicators of how old the egg is.
- The shell should feel rough to the touch and have a natural matte finish, avoiding any unusual or artificial shine.
- Carefully examine the entire surface for cracks, fissures, or any type of damage that could compromise its quality.
- When bringing the egg close to your nose, you shouldn't detect any strange or unpleasant odors.
Combining at least two of these methods will allow you to determine more accurately the freshness of the eggs before starting your preparation.

How to Prevent Eggs from Cracking During Cooking
Preventing eggs from cracking during cooking is easier than it seems. Here are the most effective methods that will guarantee success in your preparation.
Initial Preparation
- Take the eggs out of the refrigerator 30 minutes before cooking to allow them to reach room temperature, this will significantly reduce the risk of cracking during cooking.
The Pin Method
- Carefully make a small hole in the wider end of the egg where the air pocket is located. This technique allows gas to escape when the air expands during cooking.
Cooking Tips
- Place the eggs in the water while it's still cold and let them heat up together.
- Add a splash of vinegar to the cooking water, this will help proteins coagulate quickly if the shell cracks.
- Add a pinch of salt to the boiling water along with the vinegar to help the shell contract and stay firm.
Following these simple steps, you'll achieve perfect hard-boiled eggs without cracks. The key is to be patient and careful throughout the preparation process.

Ingredients for Hard-Boiled Eggs
To prepare perfect hard-boiled eggs, you'll need just a few ingredients, but each one serves a specific function in the cooking process.
- Large Eggs: 4-6 units, should be at refrigeration temperature to achieve a better thermal shock and more uniform cooking.
- Water: 3 liters, should be enough to cover the eggs by at least two centimeters and allow water to circulate freely between them.
- Salt: 1 tablespoon, helps the white coagulate quickly if any egg breaks and prevents it from dispersing.
- Vinegar: 1 tablespoon, helps keep the shell intact during cooking and makes the peeling process easier.
- Ice: 2 cups, to prepare the cold water bath that will stop the cooking process and make peeling easier.

How to Make Hard-Boiled Eggs Step by Step
Making perfect hard-boiled eggs requires attention to detail and following a specific sequence of steps. Here's the complete process.
Step 1: Initial Preparation
- Remove the 4-6 eggs from the refrigerator and let them rest at room temperature for 30 minutes to avoid thermal shock.
- Check that the eggs have no cracks and are in good condition before starting the cooking process.
- Prepare a large pot with 3 liters of water to cover the eggs by at least two centimeters.
Step 2: Water Preparation
- Add 1 tablespoon of salt and 1 tablespoon of vinegar to the cold water to help coagulation in case of breakage.
- Carefully place the eggs at the bottom of the pot using a spoon to avoid impacts.
- Make sure the water completely covers the eggs and turn the heat to medium-high.
Step 3: Cooking Process
- Once the water starts boiling, reduce heat to medium to maintain a gentle and steady simmer.
- Set a timer according to desired doneness: 7 minutes for creamy yolk, 10 minutes for fully cooked yolk.
- Keep the temperature constant throughout the cooking process to ensure uniform results.
Step 4: Cooling
- Prepare a large bowl with cold water and 2 cups of ice cubes while the eggs are cooking.
- Remove the eggs with a slotted spoon and transfer them immediately to the ice water bath.
- Let the eggs cool completely in the ice water for at least 5 minutes.
Step 5: Peeling and Serving
- Gently tap the egg against a flat surface to create small cracks all over the shell.
- Start peeling from the wider end where the air pocket is, doing so under a stream of cold water.
- Serve immediately or store in an airtight container in the refrigerator for up to a week.

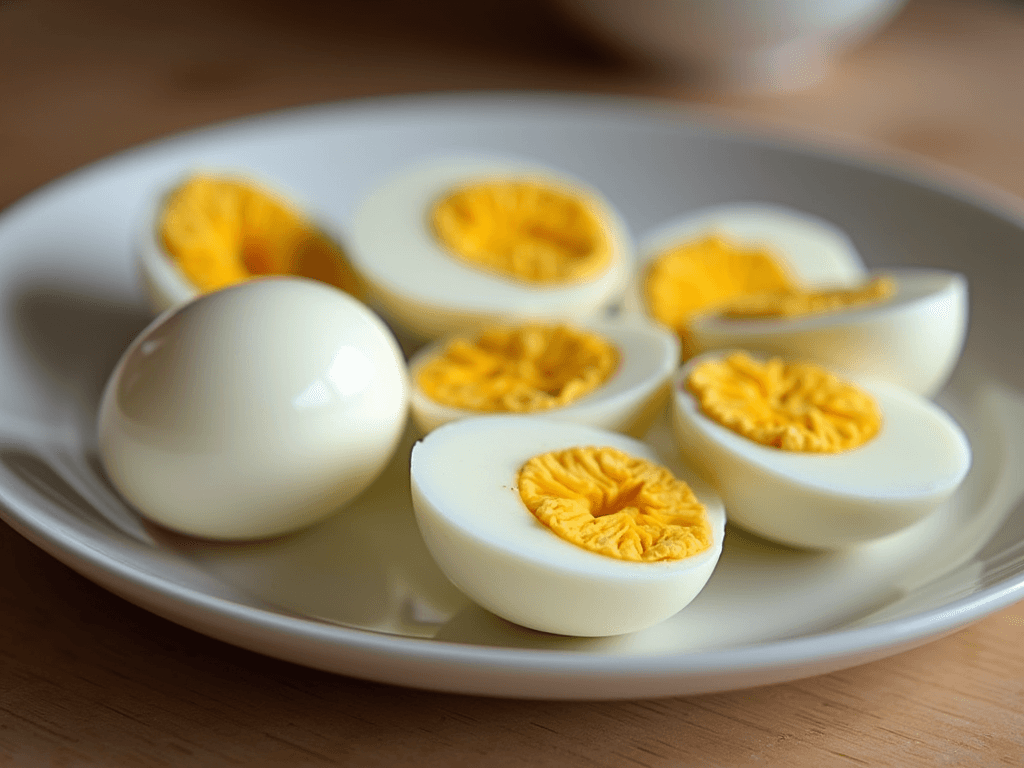
Cooking Times According to Desired Yolk Consistency
Cooking times are crucial for achieving the perfect yolk texture. Below is a detailed guide to different cooking stages, always starting with boiling water and using large eggs.
Liquid Yolk
- 6 minutes: The yolk remains completely liquid and the white is soft, ideal for serving in an egg cup for bread dipping.
- 6.5 minutes: Results in a soft and creamy yolk, perfect for toast or salads.
Creamy Yolk
- 8 minutes: The yolk is partially set but maintains a soft center, excellent for salads.
- 10 minutes: The yolk is almost completely set but retains a slight softness in the center.
Fully Cooked Yolk
- 12 minutes: The yolk is firm but maintains its creaminess, ideal for deviled eggs.
- 14 minutes: Completely hard-boiled egg with firm yolk and perfectly cooked white.
Important: Do not exceed 15 minutes of cooking time, as a greenish-gray ring will appear around the yolk due to a chemical reaction between sulfur and iron.

The Ice Water Trick: Why It's Important
The ice water bath after cooking is a crucial step that you shouldn't skip, as it serves several essential functions in achieving perfect hard-boiled eggs.
Main Benefits
- Stops cooking immediately, preventing residual heat from continuing to cook the egg and avoiding the greenish-gray ring around the yolk.
- Helps the white maintain a tender texture and prevents it from becoming rubbery.
- Significantly facilitates the peeling process by creating a thermal shock that separates the membrane from the shell.
Correct Process
- Prepare a large container with cold water and plenty of ice cubes while the eggs are cooking.
- Transfer the eggs immediately to the ice bath using a slotted spoon.
- Keep the eggs in the ice water for at least 15 minutes to ensure complete cooling.
The rapid cooling not only improves the egg's texture but also allows you to peel it without burning your fingers and keeps the yolk perfectly centered. Additionally, the ice water helps eliminate the characteristic sulfurous smell of cooked eggs.

Foolproof Techniques for Easy Hard-Boiled Egg Peeling
Peeling hard-boiled eggs can be a frustrating task, but with the right techniques, it becomes a simple process. Here are the most effective methods for achieving perfectly peeled eggs.
The Rolling Method
- Gently tap both ends of the egg against a hard surface to create small cracks and allow air to enter.
- Place the egg sideways on the table and roll it while applying gentle pressure with your palm.
- Place the egg in lukewarm water and start peeling from the wider end, where the air pocket is located.
The Shaking Method
- Place the eggs in a pot with cold water for 2-3 minutes.
- Empty the water, cover the pot, and shake it vigorously.
- Peel the eggs under running water to remove shell remnants.
The Spoon Method
- Tap the wider end of the egg to crack the shell and break the air pocket.
- Slide a spoon between the shell and the egg, taking advantage of its curved shape.
- Gently move the spoon around the egg to separate the shell.
Additional Tips
- Add a splash of vinegar to the cooking water to soften the shell.
- Peel the eggs under cold running water to help separate the membrane from the white.
- Use older eggs, as their air chamber is larger and makes peeling easier.

How Long They Last and How to Store Them
Hard-boiled eggs have different storage times depending on their state and storage method. It's essential to know these timeframes to ensure food safety.
Storage Duration by State
- With shell: can be refrigerated for up to 7 days maximum after cooking.
- Without shell: best consumed the same day they are peeled.
- At room temperature: should not remain out of the refrigerator for more than 2 hours.
- In preparations (salads, mayonnaise): storage time reduces to 3-4 days.
Correct Storage Method
- Cool the eggs in ice water and dry them completely with paper towels before storing.
- Store them with the shell intact whenever possible.
- Place them in an airtight container in the middle section of the refrigerator.
- Avoid storing them in the refrigerator door to prevent temperature changes.
For Peeled Eggs
- Option 1: Store them in a container with cold water, changing the water daily.
- Option 2: Place them in an airtight container with damp paper towels, replacing the paper daily.
Important Warnings
- Do not freeze whole hard-boiled eggs, as the white becomes rubbery.
- Keep them away from strong-smelling foods like garlic or cheese.
- Discard any egg that shows strange odors or color changes.

Frequently Asked Questions (FAQs)
Q: Should I add salt and/or vinegar to the water?
A: One tablespoon of salt and a splash of vinegar in the cooking water help the white coagulate quickly if the egg breaks, while also making peeling easier afterward.
Q: Should eggs be at room temperature?
A: Yes, it's recommended to take eggs out of the refrigerator 30 minutes before cooking to avoid thermal shock and reduce the risk of cracking during cooking.
Q: Which eggs are easier to peel?
A: Eggs closer to their expiration date are easier to peel than very fresh ones. However, they may need up to an extra minute of cooking time compared to freshly laid eggs.
Q: How long do hard-boiled eggs last in the refrigerator?
A: Hard-boiled eggs with shells, stored in an airtight container, stay in good condition for up to a week in the refrigerator.


