Benefits of Making Vinegar at Home
Making homemade vinegar is not only an entertaining and rewarding activity, but it also offers several benefits that make it an attractive option compared to commercial vinegar. Here are some of the main benefits of making vinegar at home:
- Complete control over ingredients: You can choose fresh, high-quality ingredients without additives or artificial preservatives.
- Flavor customization: By making it at home, you can adjust the flavor to your liking, adding fruits, herbs, or spices to create a unique vinegar.
- Natural and healthy process: Homemade vinegar is produced through natural fermentation, preserving the healthy properties of the ingredients.
- Cost-effective: Making vinegar at home can be much cheaper than buying high-quality varieties in stores.
- Sustainability: By making your own vinegar, you can reuse fruit scraps or food leftovers that would normally be discarded, reducing waste.
- Chemical-free: Unlike some commercial vinegars that may contain chemicals or be highly processed, homemade vinegar is completely natural.
- Encourages self-sufficiency: Making your own vinegar fosters practical skills and allows you to rely less on commercial products.
These benefits make homemade vinegar production not only a healthy option but also a sustainable and economical one. Additionally, it’s an excellent way to experiment with unique flavors and textures.

Basic Ingredients for Making Homemade Vinegar
Making vinegar at home is a simple process that requires only a few essential ingredients. Below are the necessary ingredients and their role in the production of homemade vinegar:
- White wine (1 liter): This will be the fermentable liquid base that provides the sugars needed for fermentation. White wine is an excellent option for making homemade white vinegar, as it contains the alcohol that acetic bacteria will transform into acetic acid.
- Sugar (50 g per liter of water): Sugar feeds the acetic bacteria during fermentation, helping to convert alcohol into acetic acid. If you're using a very sweet wine, you can reduce the amount of sugar.
- Water (enough to dilute the wine): Chlorine-free water dilutes the alcohol content and facilitates the fermentation process. It's important to use chlorine-free water so as not to kill the bacteria necessary for fermentation.
- "Mother" of vinegar or unpasteurized vinegar (100 ml per liter of liquid): This is a live culture of acetic bacteria that initiates the fermentation process. If you don't have "mother," you can use a bit of unpasteurized vinegar as a starter.
These are the basic elements you need to start making your own homemade vinegar. Be sure to follow the proper proportions and use fresh ingredients to obtain high-quality vinegar.

How to Make Homemade White Vinegar
Follow these detailed steps to make homemade white vinegar effectively:
- Prepare the base: Start by mixing 1 liter of white wine with 500 ml of chlorine-free water. It’s important that the water is chlorine-free, as chlorine can interfere with the fermentation process. Make sure to mix both liquids well in a clean, large container.
- Add sugar: Dissolve 50 g of sugar into the wine and water mixture. The sugar is necessary to feed the acetic bacteria, which are responsible for converting alcohol into acetic acid, the main component of vinegar.
- Incorporate the "mother" of vinegar: Add 100 ml of "mother" vinegar or unpasteurized vinegar to the mixture. This live culture of acetic bacteria will start the fermentation process and convert the alcohol into vinegar.
- Cover the container: Cover the container with a clean cloth or gauze to allow air to enter, but prevent dust or insects from getting in. Secure the cloth with a rubber band to keep it in place.
- Place in a warm, dark location: Place the container in a warm spot (between 20-30°C) and keep it away from direct sunlight. The right temperature is key for acetic bacteria to develop properly and convert alcohol into acetic acid.
- Let it ferment: Let the mixture sit for at least 2 weeks, although it may take up to 2 months depending on environmental conditions. During this time, the bacteria will work on transforming the alcohol into vinegar.
- Test the acidity: After a few weeks, start testing the acidity of the liquid to ensure it has reached the desired level (usually between 4% and 7% acetic acid). You can do this by tasting a small amount or using pH test strips.
- Filter and bottle: Once your vinegar has reached the appropriate acidity, filter the mixture to remove any solid residues or remnants of "the mother." Use a fine strainer or cloth for this step.
- Store properly: Bottle your filtered vinegar in clean, airtight jars. Store it in a cool, dark place to preserve its flavor and quality for longer.
By following these steps carefully, you’ll produce high-quality homemade white vinegar, perfect for use in recipes or even as a natural cleaning product.

How to Speed Up the Vinegar Fermentation Process
If you want to speed up the fermentation process of your homemade vinegar, there are several methods you can apply to optimize the conditions in which acetic bacteria work. Here’s how to accelerate this process:
- Increase the temperature: Keep the container in a warm place, between 25°C and 30°C, so that the acetic bacteria work faster and convert the alcohol into vinegar.
- Add more "mother": Increasing the amount of "mother" of vinegar or unpasteurized vinegar accelerates the process by boosting the population of active bacteria.
- Use a more diluted alcohol base: Diluting the wine or alcohol to a concentration of 5-10% makes it easier for acetic bacteria to convert alcohol into acetic acid more quickly.
- Improve oxygenation: Make sure to cover the container with a cloth that allows air to enter and stir the mixture occasionally to improve oxygenation.
- Use an active starter: Using unpasteurized vinegar with live bacteria from the beginning significantly speeds up the fermentation process.
- Avoid filling the container completely: Leave enough space for air to circulate inside the jar, which improves oxygenation and speeds up fermentation.
By following these tips, you can significantly reduce the time needed to make homemade vinegar without compromising its quality. However, remember that even with these accelerated methods, it’s important to be patient and allow the natural process to occur properly.

How to Control the Acidity of Vinegar
Controlling the acidity of homemade vinegar is essential to ensure its quality and proper use, whether in cooking or other applications. Here’s how you can adjust and maintain acidity levels effectively:
- Test the vinegar regularly: During the fermentation process, it’s important to test the vinegar weekly to monitor its acidity. You can do this using pH test strips or by tasting a small amount. The ideal acidity level is usually between 4% and 7% acetic acid.
- Dilute with water if it’s too acidic: If the vinegar turns out too strong, you can dilute it with chlorine-free water. Add water gradually and taste until you reach the desired acidity level. Remember that over-diluting may affect its flavor and preservative properties.
- Add more "mother" to increase acidity: If you notice that the vinegar hasn’t reached the proper acidity, you can add more "mother" of vinegar or a bit of unpasteurized vinegar to reactivate the fermentation process and increase the acidity.
- Control the temperature: Temperature plays a crucial role in developing acidity. Keep the vinegar in a warm place (between 20°C and 30°C), as acetic bacteria work best under these conditions, helping to develop a good concentration of acetic acid.
- Filter properly: Once you’ve reached the desired level of acidity, filter the vinegar to stop the fermentation process. This will prevent it from becoming too acidic over time.
- Use pH test strips or a pH meter: For an accurate measurement of acidity levels, use pH test strips or a pH meter. A pH between 2.4 and 3.4 indicates a good concentration of acetic acid for homemade vinegar.
By following these steps, you can effectively control the acidity of your homemade vinegar, ensuring it’s suitable for your culinary or household needs.

What to Do if Your Homemade Vinegar Is Not Fermenting Correctly
If you notice that your homemade vinegar is not fermenting properly, here are some steps you can follow to correct the process:
- Check the temperature: Make sure the container is in a warm place, between 20°C and 30°C. If the temperature is too low, the acetic bacteria won’t be able to work properly.
- Add more "mother": If fermentation hasn’t started or is very slow, try adding more "mother" of vinegar or a bit of unpasteurized vinegar to reactivate the process.
- Verify the alcohol concentration: If the alcohol base is too strong (over 10%), acetic bacteria may have trouble converting it into acetic acid. Dilute it with chlorine-free water until it reaches a suitable concentration (5-10%).
- Increase oxygenation: Acetic bacteria need oxygen to ferment properly. Ensure the container is covered with a cloth or gauze that allows air to enter, but avoid sealing it tightly.
- Try another starter: If after several days you don’t see signs of fermentation, try a new batch of "mother" or switch to another unpasteurized vinegar to restart the process.
- Avoid contamination: Make sure all equipment is thoroughly cleaned before starting. Contamination by unwanted bacteria can inhibit fermentation.
By following these steps, you should be able to correct any issues and reactivate the fermentation process to successfully make homemade vinegar.

How to Know if Your Homemade Vinegar Has Been Contaminated
It’s important to ensure that your homemade vinegar doesn’t get contaminated during the fermentation process. Here’s how to identify if your vinegar has been contaminated:
- Unpleasant smell: If the vinegar emits a strong, unpleasant odor, different from the typical acidic aroma, it could be a sign of contamination by unwanted bacteria or mold.
- Presence of mold: If you notice black, green, or white spots on the surface of the liquid or around the edges of the container, it’s likely that the vinegar has been contaminated by fungi.
- Unusual gelatinous or foamy texture: Although "the mother" of vinegar is a natural gelatinous substance, if you observe an unusual foamy or lumpy texture, it could be a sign of contamination.
- Strange color: If the color of the vinegar changes drastically (for example, turning dark brown or showing spots), this could indicate that something went wrong in the process.
- Unpleasant taste: If when tasting the vinegar you notice a bitter, metallic, or extremely unpleasant flavor, it’s likely that it has been contaminated.
- Growth of unwanted bacteria: If you see excessive bubbles or strange substances growing on the surface that don’t resemble "the mother," it’s possible that other bacteria have invaded the vinegar.
If you detect any of these signs, it’s best to discard the vinegar to avoid health risks. Always ensure good hygiene practices during fermentation to prevent contamination.

Culinary Uses of Vinegar
Vinegar is a versatile ingredient in the kitchen that can enhance flavors and serve various functions. Here are some of the most common and effective uses of vinegar in cooking:
- Salad dressings: Vinegar is a key component in many dressings, such as vinaigrette, where it is mixed with oil, herbs, and spices to give salads a refreshing, tangy touch.
- Marinades: Vinegar is used to marinate meats, poultry, and fish, as its acidity helps tenderize the fibers and enhance the flavors of the ingredients.
- Food preservation: Vinegar is an excellent natural preservative. It is used in the preparation of pickles like cucumbers, onions, or carrots, helping to preserve food for longer.
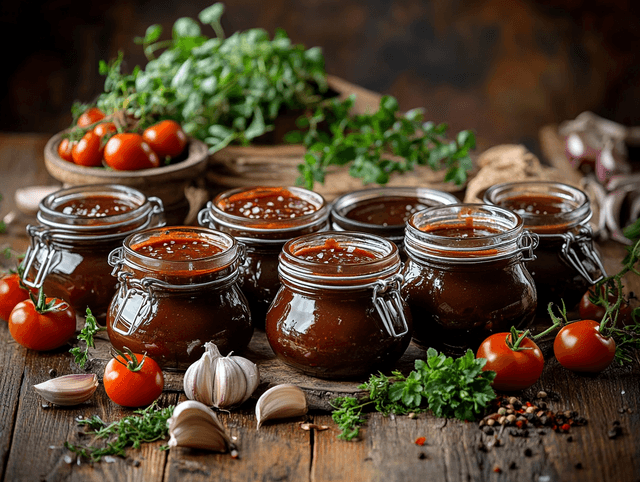
- Sauces and reductions: In many sauces, such as barbecue or homemade tomato sauce, vinegar provides a balance between sweetness and acidity. It can also be reduced to create intense glazes.
- Baking: In some baking recipes, vinegar acts as a leavening agent when combined with baking soda, helping baked goods become lighter and fluffier.
- Deglazing pans: After cooking meats or vegetables in a pan, vinegar can be used to deglaze, releasing the caramelized juices from the bottom and creating a flavorful base for sauces.
These are just a few examples of how vinegar can be used in the kitchen to improve flavors and textures. Its versatility makes it an essential ingredient in any pantry.

How to Properly Store Homemade Vinegar
Properly storing homemade vinegar is crucial to maintaining its flavor, quality, and durability. Here’s how to do it effectively:
- Use glass bottles: Vinegar should be stored in glass containers, as this material doesn’t react with acetic acid. Avoid metal or plastic containers, which can degrade over time.
- Seal tightly: Make sure the bottles are well sealed to prevent air from entering, which could affect the quality of the vinegar and alter its acidity.
- Store in a cool, dark place: Vinegar should be kept in a cool, dark place, such as a pantry or cupboard. Direct sunlight and heat can deteriorate its flavor and properties.
- Avoid extreme temperatures: Don’t store vinegar in places where temperatures fluctuate too much, like near stoves or refrigerators. Keeping it at a stable room temperature is ideal.
- Lasts indefinitely: If stored properly, homemade vinegar can last indefinitely without losing its properties. However, over time, it may develop "the mother," which is harmless and can be filtered out if you prefer.
By following these steps, you’ll be able to enjoy your homemade vinegar for a long time without losing its quality or benefits.

Frequently Asked Questions (FAQs)
Q: How long does it take for homemade vinegar to ferment?
A: The fermentation process for homemade vinegar can take between 2 weeks and 2 months, depending on factors such as temperature, the amount of alcohol, and the presence of the "mother" of vinegar.
Q: Is it necessary to use "the mother" to make homemade vinegar?
A: It is not strictly necessary, but using "the mother" or unpasteurized vinegar speeds up the fermentation process and ensures that acetic bacteria are present from the start.
Q: What type of alcohol can be used to make vinegar?
A: You can use various types of alcohol such as white wine, red wine, cider, or even beer. The important thing is that the alcohol has an appropriate concentration (5-10%) so that acetic bacteria can convert it into acetic acid.
Q: How do I know if my homemade vinegar is ready?
A: You know your vinegar is ready when it has reached the desired level of acidity, usually between 4% and 7%. You can taste it directly or use pH test strips for a more accurate reading.