How to Choose the Best Type of Ham for Cooking
To choose the best type of ham for cooking, it's important to consider several factors that will influence the flavor and quality of the final product.
1. Types of Ham
- Ibérico Ham: From Iberian pigs, known for its intense flavor and juicy texture. Classified by the pig's diet:
- Serrano Ham: From white pigs, less fatty than Ibérico with a milder flavor. Classified by curing time:
2. Factors to Consider
- Curing: Natural curing is preferable for its positive impact on flavor and texture. Ibérico hams usually have a longer curing process, intensifying their flavor.
- Salt Percentage: A low salt content is ideal for a healthier ham with a slower curing process.
- Price: Quality comes at a cost. Be wary of very low prices, as ham production and curing are expensive processes.
- Physical Characteristics:
3. Final Tips
- When choosing a ham, consider both the type and specific characteristics that align with your culinary needs.
- A good ham should have a balanced ratio of meat to fat to ensure juiciness when cooked.
This guide will help you select the best ham according to your culinary preferences and the type of dish you want to prepare.

Essential Ingredients for Cooking a Ham
To prepare a delicious ham, it's important to have the right ingredients that will enhance its flavor and ensure perfect cooking.
1. Ham
- Type of Ham: You can choose between fresh, cured, or smoked ham, depending on your preferences and the cooking method you plan to use.
2. Basic Ingredients
- Coarse Salt (1/4 cup): Essential for seasoning and helping to form a tasty crust during cooking.
- Pepper (1 teaspoon): Adds a touch of flavor and aroma to the ham.
3. Cooking Liquids
- White Wine (1 cup): Used for marinating or basting the ham during cooking, providing a deep flavor.
- Water or Broth (2 cups): To maintain moisture and prevent the ham from drying out.
4. Glazes and Marinades
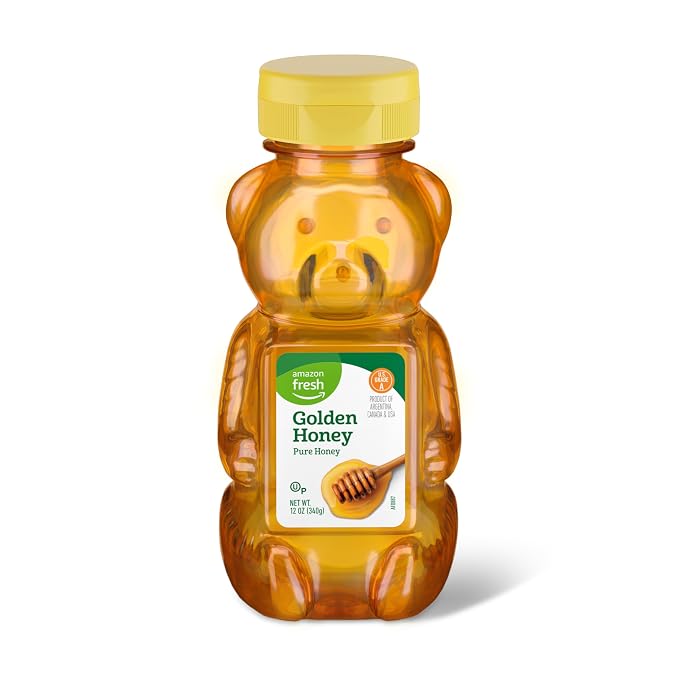
- Brown Sugar (1/2 cup) or Honey (1/3 cup): To create a sweet glaze that caramelizes during cooking.
- Mustard (2 tablespoons): Combines well with sugar for a balanced glaze.
- Aromatic Herbs (such as rosemary or thyme, 1 tablespoon): To infuse fresh and herbal flavors.
These ingredients will provide you with a solid base to prepare a flavorful and well-cooked ham.

Preparation of Ham Before Cooking
Properly preparing the ham is crucial to ensure a flavorful and well-cooked result.
Thawing
- Refrigerator: Thaw the ham in the refrigerator for 1 to 3 days, depending on its size. This ensures a uniform and safe thawing process.
- Cold Water Bath: If you need to thaw it faster, submerge the ham in cold water, changing the water every 30 minutes.
Cleaning
- Rinsing: Wash the ham with cold water to remove any brine or preservative residues.
- Drying: Thoroughly dry the ham with paper towels to prepare it for cooking.
Surface Cuts Before Cooking
- Surface Cuts: Make diamond-shaped cuts on the surface of the ham. This allows flavors to penetrate better and helps the glaze adhere if you decide to use one.
These steps will ensure your ham is ready to cook evenly and with delicious flavor.

Ham Cooking Methods: Oven, Slow Cooker, and Electric Roaster
Cooking a ham can be done in various ways, each with its own advantages. Below are detailed steps for cooking a ham using the oven, slow cooker, and electric roaster, including all necessary steps to properly season the ham.
1. Oven Cooking
- Preheat the Oven: Set the oven to 160°C (320°F) to ensure even cooking.
- Prepare the Ham: Make shallow diamond-shaped cuts on the surface of the ham to allow flavors to penetrate.
- Season the Ham: Sprinkle 1/4 cup of coarse salt and 1 teaspoon of pepper over the entire surface of the ham, ensuring it gets into the cuts.
- Place in Baking Tray: Put the ham on a baking tray with the skin side up.
- Add Liquids: Pour 1 cup of white wine and 2 cups of water or broth into the bottom of the tray. This will help maintain moisture during cooking.
- Glaze (Optional): Mix 1/2 cup of brown sugar with 2 tablespoons of mustard and a bit of pineapple juice. Generously apply over the ham before placing it in the oven.
- Cooking Process: Bake the ham for approximately 30 minutes per kilogram. For example, a 5 kg ham will need about 2.5 hours.
- Periodic Basting: Open the oven every 30 minutes to baste the ham with its juices, which will help keep it moist and flavorful.
- Finishing Touch: When the internal temperature of the ham reaches 65°C (149°F), you can briefly increase the oven temperature to brown the surface.
- Resting: Once cooked, remove the ham from the oven and let it rest for 15-20 minutes before slicing.
2. Slow Cooker Cooking
- Prepare the Base: Place potatoes or vegetables at the bottom of the slow cooker to prevent sticking and add flavor.
- Place the Ham: Put the ham directly on top of the vegetables.
- Season the Ham: Sprinkle salt and pepper over the entire surface of the ham before placing it in the slow cooker.
- Glaze (Optional): If desired, mix honey with a bit of mustard and apply over the ham before starting to cook.
- Cooking Process: Cook on high for 4 hours or on low for 6 to 8 hours, depending on the size of the ham and slow cooker.
- Mid-Cooking Check: Check halfway through cooking to ensure even cooking and baste with juices generated in the pot.
- Final Resting: Once cooked, remove the ham and let it rest for a few minutes before slicing.
3. Electric Roaster Cooking
- Preheat Roaster: Set the electric roaster to 160°C (320°F) and place a rack inside to allow heat circulation around the ham.
- Place Ham in Roaster: Position the ham on the rack with skin side up.
- Season the Ham: Sprinkle salt and pepper over all surfaces before placing it in the electric roaster.
- Add Liquids to Roaster: Add 2 cups of water or broth at the base to create steam and keep it moist during cooking.
- Glaze (Optional): Prepare a glaze with brown sugar and orange juice, applying it over the ham before or during the last 30 minutes of cooking.
- Roasting Process: Roast for approximately 30 minutes per kilogram; for example, a 5 kg ham will require about 2.5 hours.
- Periodic Basting: Baste with juices from the bottom every 30 minutes to prevent drying out and enhance flavor.
- Final Check: Ensure that internal temperature reaches 65°C (149°F) before removing from roaster.
- Final Resting: Let rest for 15-20 minutes after removing from roaster so juices redistribute before slicing.
These methods offer different results and can be chosen based on personal preferences and available equipment. Each technique ensures a juicy and flavorful ham if steps are followed correctly, including an optional glaze for extra flavor and attractive visual presentation.

Cooking Time Based on Ham Weight
The cooking time for ham varies depending on its weight and the preparation method used. Here is a detailed guide to calculate the appropriate cooking time based on the weight of the ham.
General Oven Cooking Guide
- Oven Temperature: Preheat the oven to 325°F (163°C).
- Whole Bone-In Ham (10-14 lb):
- Cooking Time: 18 to 20 minutes per pound.
- Example: A 12-pound ham will require approximately 216 to 240 minutes (3 hours and 36 minutes to 4 hours).
- Half Bone-In Ham (5-7 lb):
- Cooking Time: 22 to 25 minutes per pound.
- Example: A 6-pound ham will need between 132 and 150 minutes (2 hours and 12 minutes to 2 hours and 30 minutes).
- Boneless Shoulder Ham (5-8 lb):
- Cooking Time: 30 to 35 minutes per pound.
- Example: A 7-pound ham will require approximately between 210 and 245 minutes (3 hours and 30 minutes to 4 hours and 5 minutes).
Cooking for Pre-Cooked Hams
- Whole Bone-In Ham (10-14 lb):
- Reheating Time: 15 to 18 minutes per pound.
- Example: A 10-pound ham will need between 150 and 180 minutes (2 hours and 30 minutes to 3 hours).
- Half Bone-In Ham (5-7 lb):
- Reheating Time: 18 to 24 minutes per pound.
- Example: A 5-pound ham will need between 90 and 120 minutes (1 hour and 30 minutes to 2 hours).
Slow Cooker Cooking
For slow cooker cooking, it is recommended to cook the ham on low for approximately 6 to 8 hours, regardless of weight, ensuring that the internal temperature reaches at least 145°F (63°C) for fresh hams or the appropriate levels for pre-cooked ones.
Final Considerations
- Internal Temperature Check: It is crucial to use a meat thermometer to verify that the center of the ham reaches at least 145°F (63°C) to ensure it is fully cooked.
- Resting: Let the ham rest for at least 15-20 minutes after removing it from the oven or roaster before slicing. This allows the juices to redistribute, ensuring juicier meat.

Differences Between Cooking Bone-In and Boneless Ham
Cooking a bone-in or boneless ham involves different considerations that can affect flavor, texture, and ease of preparation. Here are the main differences and advantages of each type.
Bone-In Ham
- Flavor and Aroma: The bone contributes to more even curing and adds depth to the ham's flavor. The nuances are richer and more complex, resulting in a more authentic and traditional taste experience.
- Texture: The presence of the bone helps retain the ham's juiciness during cooking, which can result in a more tender texture.
- Presentation: Bone-in ham is visually impressive and suitable for special occasions. Carving the ham directly from the bone can be a ritual that enhances the culinary experience.
- Bone Usage: Once the ham is consumed, the bone can be used to flavor broths and soups, adding extra value to the product.
Boneless Ham
- Ease of Cutting: Without the bone, the ham is easier to handle, cut, and serve. It is ideal for those with no experience in carving ham or for those seeking convenience.
- Storage: Boneless ham takes up less space in the fridge and is easier to store, making it practical for kitchens with limited space.
- Versatility: This type of ham adapts well to a wide range of recipes, from tapas to main dishes. Its versatility makes it ideal for a faster-paced lifestyle.
- Preservation: Although boneless ham may be more susceptible to drying out once opened, modern vacuum packaging techniques help extend its shelf life without compromising quality too much.
Final Considerations
- Personal Choice: The choice between bone-in or boneless ham depends on your personal preferences and specific needs. If you value deeper flavor and traditional presentation, choose bone-in ham. If you prefer convenience and ease of handling, boneless ham may be the better option.
- Impact on Cooking: Cooking time may vary slightly between both types due to the presence of the bone, which can act as a heat conductor.
Both types of ham have their own advantages and can be chosen based on your culinary preferences and the needs of a specific event or recipe.

How to Prevent Ham from Drying Out During Cooking
Keeping ham juicy during cooking is essential for optimal flavor and texture. Here are some effective strategies to prevent ham from drying out:
1. Proper Preparation
- Surface Cuts: Make diamond-shaped cuts on the surface of the ham. This allows flavors to penetrate better and helps retain moisture by letting juices circulate.
2. Use of Liquids
- Add Liquids to the Tray: When cooking in the oven or electric roaster, pour liquids such as white wine, broth, or water into the bottom of the tray. This creates steam during cooking, helping to keep the ham moist.
- Periodic Basting: During cooking, open the oven every 30 minutes to baste the ham with its own juices. This not only adds flavor but also prevents drying.
3. Glazing
- Apply Glaze: Use a glaze made of sugar or honey, mustard, and aromatic herbs like rosemary or thyme. Apply generously over the ham before and during cooking to create a protective layer that retains moisture.
4. Covering the Ham
- Use Aluminum Foil: Cover the ham with aluminum foil for most of the cooking time. This traps heat and vapors, keeping the meat tender and juicy.
- Remove Foil at the End: To brown the surface, remove the foil during the last 15-20 minutes of cooking.
5. Temperature Control
- Cook at Moderate Temperatures: Maintain a consistent and moderate temperature (around 160°C or 320°F) to ensure even cooking without drying out the meat.
- Check with Thermometer: Use a meat thermometer to ensure the internal temperature reaches at least 65°C (149°F), avoiding overcooking.
6. Post-Cooking Rest
- Let it Rest: Once cooked, let the ham rest for 15-20 minutes before slicing. This allows juices to redistribute within the meat, ensuring each slice is juicy.

How to Properly Carve and Serve a Cooked Ham
Carving and serving a cooked ham properly is key to enhancing its flavor and ensuring an attractive presentation. Here’s how to do it step by step.
1. Ham Preparation
- Resting: Before carving, let the cooked ham rest for 15-20 minutes after removing it from the oven or roaster. This allows the juices to redistribute, ensuring each slice is juicy.
2. Necessary Tools
- Sharp Knife: Use a long, sharp knife to carve the ham. A chef's knife or a ham slicer is ideal for clean and precise cuts.
- Cutting Board: Place the ham on a stable cutting board to prevent accidents.
3. Carving Technique
- Remove Outer Layer: If the ham has a hard outer layer or fat, remove it before starting to slice.
- Initial Cut: Position the ham with the meatiest side up. If it's a bone-in ham, start by cutting around the bone to free the slices.
- Uniform Slices: Cut thin, uniform slices parallel to the bone (if present) or against the grain of the muscle fibers to ensure maximum tenderness.
- Rotate the Ham: As you progress, rotate the ham to access different areas and continue slicing evenly.
4. Serving the Ham
- Presentation: Arrange the slices on a large plate or platter, layering them slightly overlapping for an elegant presentation.
- Ideal Temperature: Serve the ham at room temperature or slightly warm to highlight its natural flavors.
Additional Tips
- Preservation: If not serving all the ham immediately, cover exposed parts with aluminum foil or plastic wrap to retain moisture.
- Accompaniments: Consider serving the ham with sauces like mustard or chutney, as well as side dishes like mashed potatoes or roasted vegetables.
By following these steps, you can carve and serve a cooked ham professionally, ensuring each portion is flavorful and visually appealing.

Wine Pairing with Different Types of Cooked Ham
Proper wine pairing with cooked ham can enhance the flavors of both the wine and the ham, creating a harmonious culinary experience. Here are some recommendations for pairing different types of wines with cooked ham.
Red Wine
- Young and Crianza Wines: Young or crianza red wines, such as those made from Garnacha or Tempranillo grapes, are ideal for pairing with cooked ham. These wines have a lighter, fruity flavor that complements the texture and taste of the ham without overpowering it.
- Avoid Highly Structured Reds: Full-bodied reds with strong tannins or barrel aging can mask the delicate flavors of cooked ham. It's better to opt for softer reds.
White Wine
- Aged White Wines: Whites that have undergone aging, like those made from Verdejo or Viura grapes, offer balanced acidity that cleanses the palate and highlights the flavors of the ham.
- Avoid Overly Sweet Whites: Young and sweet white wines can dull the taste buds, so it's preferable to choose dry or semi-dry whites.
Rosé Wine
- Fresh and Light Rosés: Rosé wine can be a refreshing option for those who prefer a lighter pairing. They often have a hint of sweetness that can complement the flavor of cooked ham without being overwhelming.
Sparkling Wines and Cava
- Cava and Champagne: The acidity and bubbles in sparkling wines like cava or champagne are excellent for cleansing the palate between bites of ham, providing a refreshing contrast.
- Choose Dry Sparklings: For optimal pairing, select dry cavas or champagnes that don't interfere with the flavor of the ham.
Fortified Wines
- Fino and Manzanilla: These fortified wines are traditional companions to ham due to their ability to dissolve fat and enhance the salty flavors of cooked ham.
When choosing the right wine to pair with your cooked ham, consider both your personal preferences and the specific characteristics of the wine and type of ham. A good pairing not only complements but also enhances the overall tasting experience.

How to Use Leftover Cooked Ham in Other Recipes
Leftover cooked ham can be a versatile base for creating delicious dishes. Here are some general ideas to use it:
Ham Croquettes: Transform leftovers into crispy croquettes. Mix shredded ham with a thick sauce, chill the mixture, form small balls, and fry until golden.
- Ham Salad: Add chopped ham to a fresh salad. Combine it with seasonal vegetables and a light dressing for a refreshing dish.
- Pasta with Ham: Incorporate ham into a creamy pasta. Mix it with your favorite pasta, add a mild sauce, and heat until well combined.
- Ham Soup or Broth: Use the bones and leftovers to make a rich broth. Simmer with vegetables and herbs for a flavorful soup.
- Ham Pizza: Use ham as a topping on homemade pizza. Add it along with other ingredients like cheese and vegetables before baking.
- Scrambled Eggs with Ham: Add ham to scrambled eggs for a quick breakfast. Sauté the ham before adding beaten eggs and cook until done.
These ideas will allow you to enjoy cooked ham in new ways, making the most of its flavors without wasting anything.

Frequently Asked Questions (FAQs)
Q: How long should you cook a pre-cooked ham?
A: A pre-cooked ham should be heated at 325°F (163°C) for approximately 10-15 minutes per pound. This ensures the ham is warm and juicy without overcooking, preserving its flavor and texture.
Q: What is the best way to prevent ham from drying out during cooking?
A: To keep the ham juicy, cover it with aluminum foil during cooking and baste it with its juices every 30 minutes. Adding liquids such as broth or wine to the pan also helps maintain moisture.
Q: How should a cooked ham be sliced for serving?
A: Slice the ham into thin, even slices, starting from the meatiest part. Use a sharp knife and cut against the grain to achieve tender, easy-to-chew slices.
Q: What type of wine pairs well with cooked ham?
A: Cooked ham pairs well with dry white wines or sparkling wines like cava. These wines complement the salty flavor of the ham and provide a freshness that balances its richness.